How to Work with Contacts in RevukCRM: A Complete Beginner's Guide
Every call, every Instagram DM, every form submission from your site is a new contact. Whether your sales team remembers them in a week comes down to one thing: is there a card for that person in your CRM, or just a sticky note on someone's desk?
The Contacts module in RevukCRM is the foundation everything else rests on. You enter a person once — and from then on, all their chats, deals, tasks, files, and payments attach to that single card automatically. Your manager opens the customer's 360° view and in five seconds knows exactly where things stand.
Below — every main scenario worth knowing: from creating your first contact to bulk operations, tags, and custom fields.
The contacts page at a glance
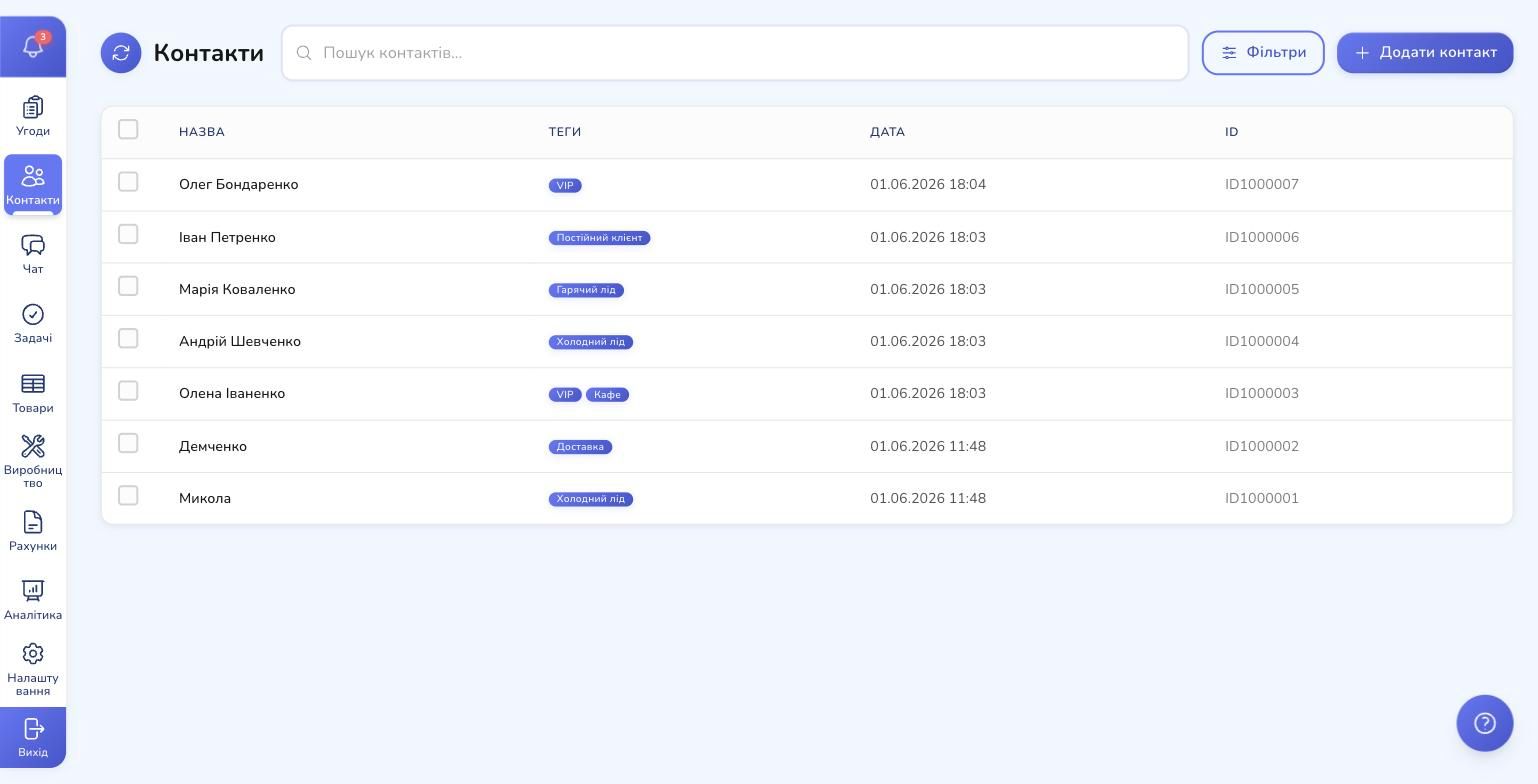
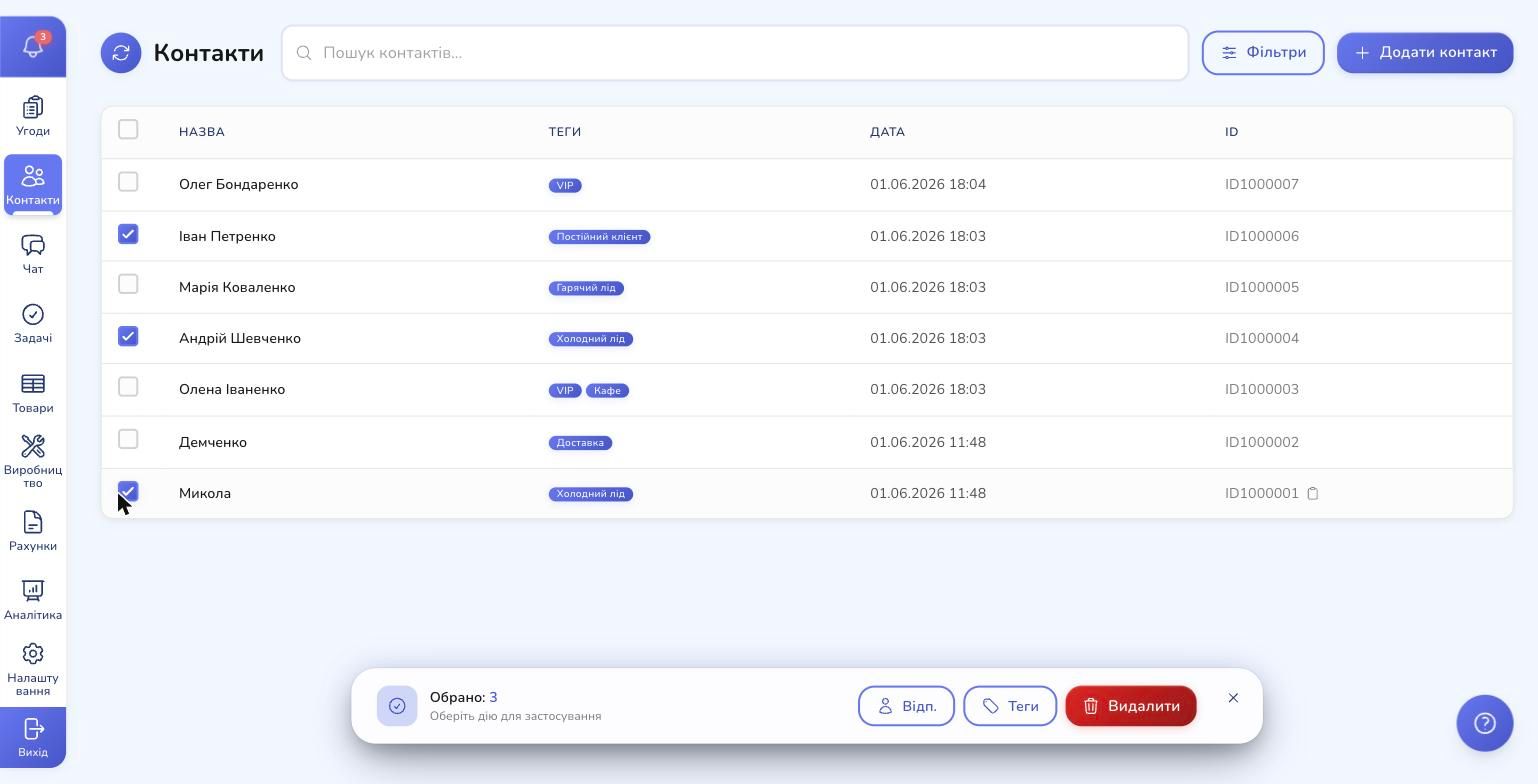
You open the section by clicking Contacts in the left navigation. You'll see a table with the columns that matter most:
- Name — the full name (click to open the contact card)
- Tags — labels you use to group people (VIP, hot lead, returning customer, etc.)
- Date — when the contact appeared in your system
- ID — a unique number with a one-click copy button
Up top: a search bar, a Filters button, and a prominent Add contact button. The most common actions are always within reach.
💡 Quick tip: click on any ID1000007 and it copies to your clipboard. A green checkmark confirms it for two seconds. Useful when you want to ping a teammate: "take a look at this customer."
Finding the right person, fast
Picture 500 contacts and you need to find Olena from Kyiv who was asking about Arabica beans last week. Two tools:
Search
The bar at the top searches across all key fields at once: name, surname, phone, email, ID. You don't have to choose where to look — type anything you remember and the list narrows down.
Filters
The Filters button opens a modal with two base parameters:
- Name — match by name fragment
- Tags — pick one or several (VIP + Café, for example)
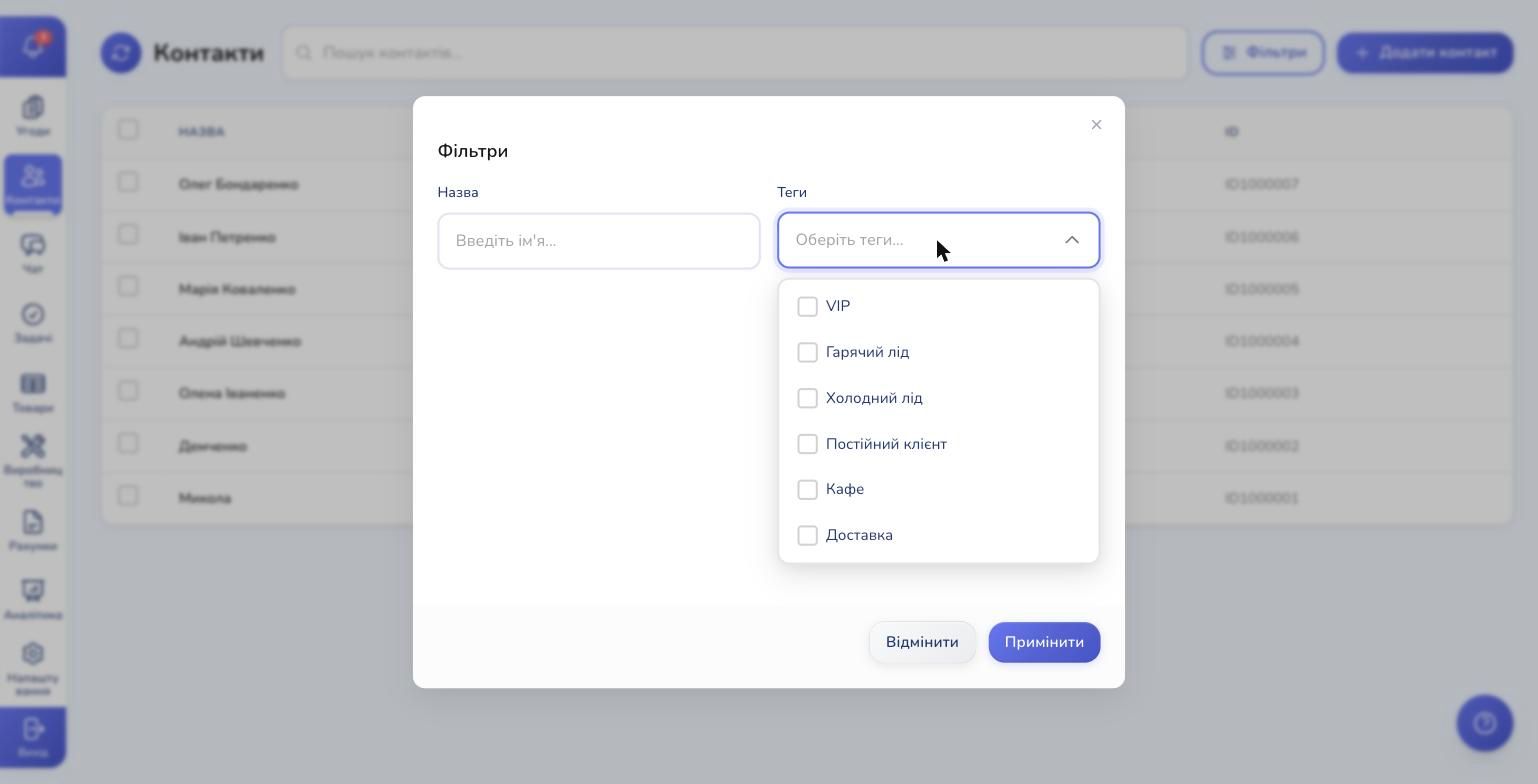
If you have custom fields turned on (more on those below), they appear right here too: you can filter by birthday, by a "Postpaid" checkbox, by a number range, and so on.
Click Apply, and the filter is stored in the URL. That means you can share a link to a ready-made segment with a teammate ("here are our VIP customers from the last month") and they'll see the exact same list.
The 360° customer card: everything in one place
Click on a name in the list — and the full contact card opens.
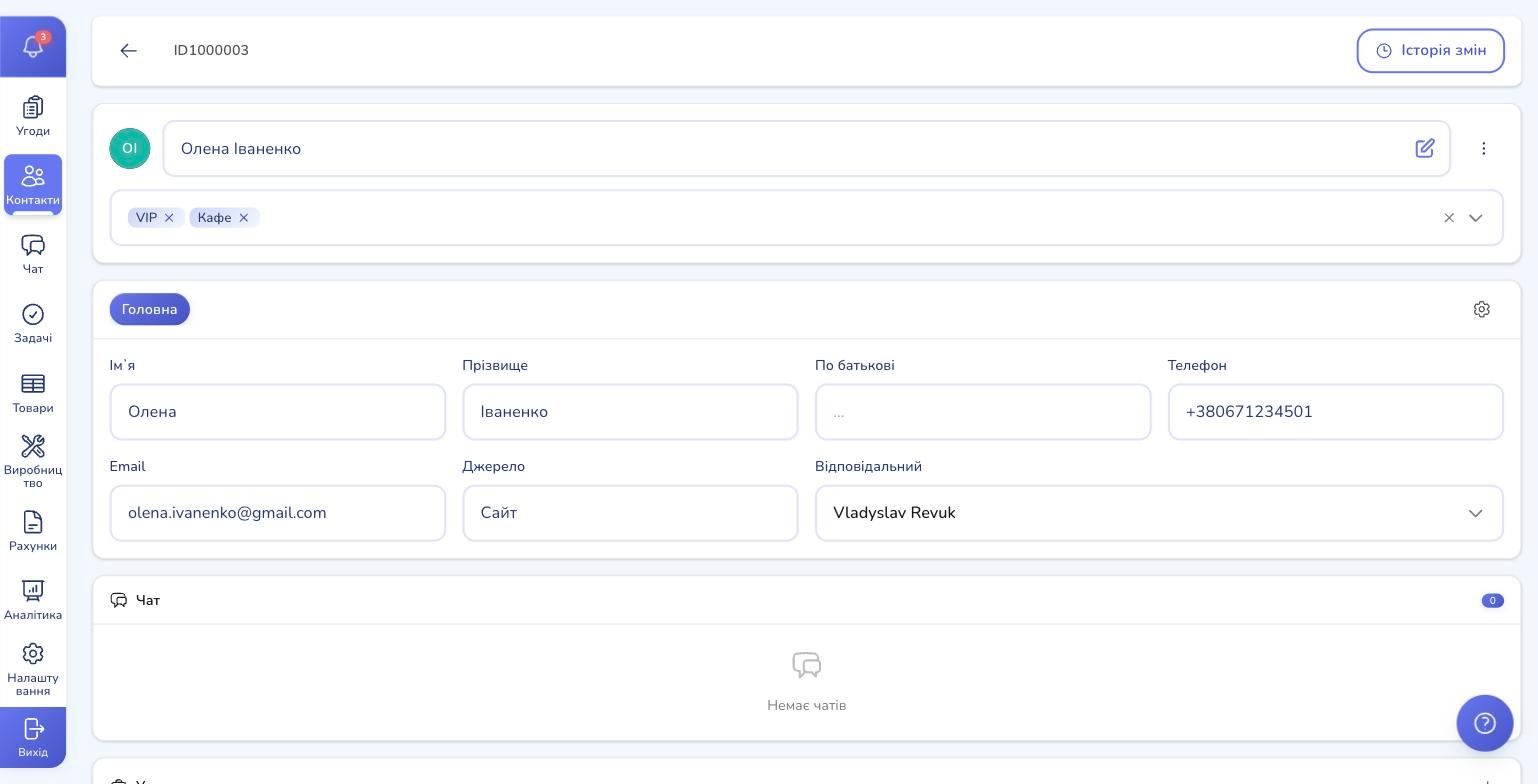
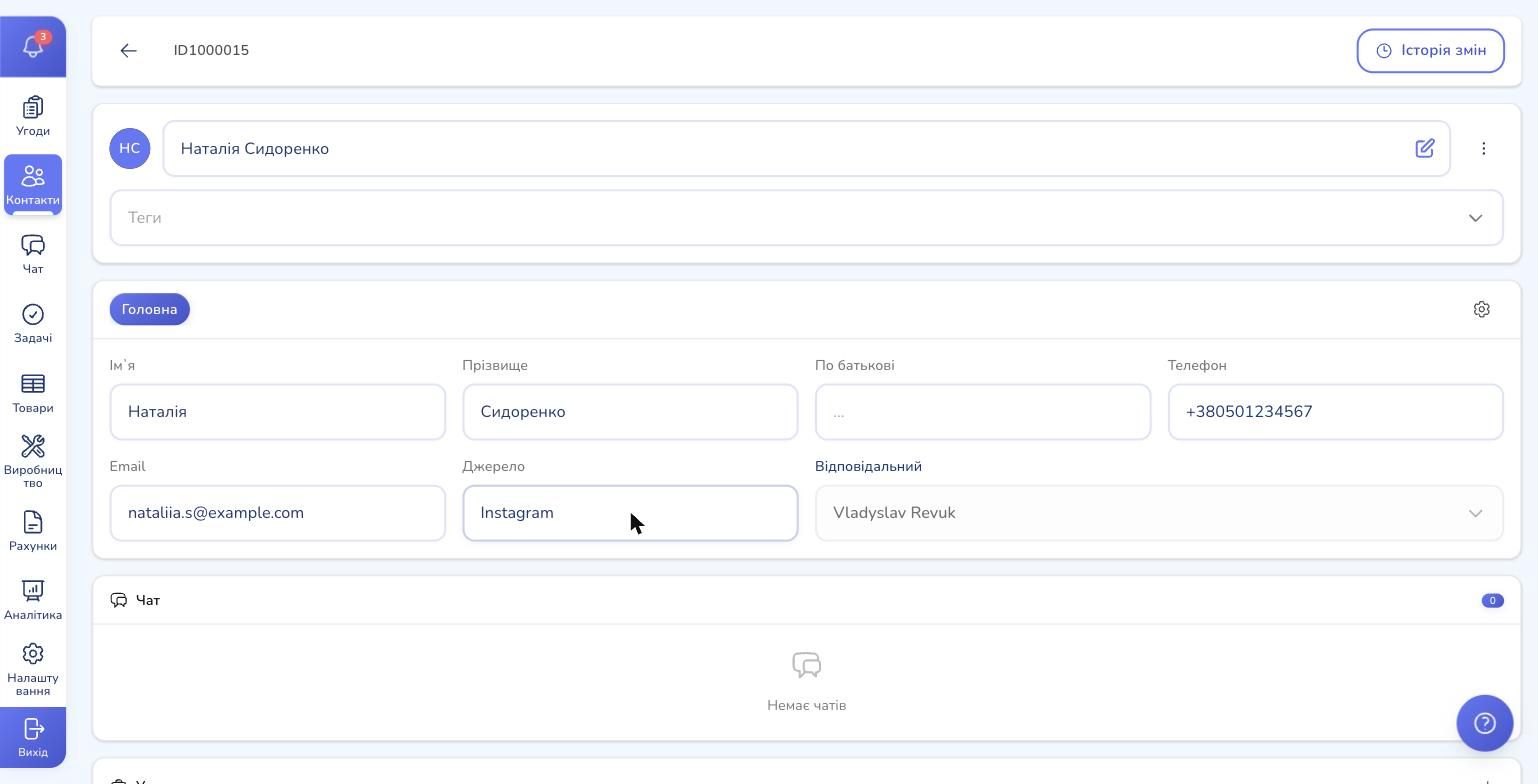
At the top: the name, avatar, and tags (you can add or remove tags right here). Below: the "Main" category with the standard fields:
- First name, Last name, Father's name
- Phone, Email
- Source (where the contact came from)
- Responsible manager or team
All of these are editable inline — change something, move on, and your edit is saved automatically. There's no separate "Save" button, and that's intentional: fewer clicks, fewer forgotten changes.
Scroll down — and that's where the real payoff begins:
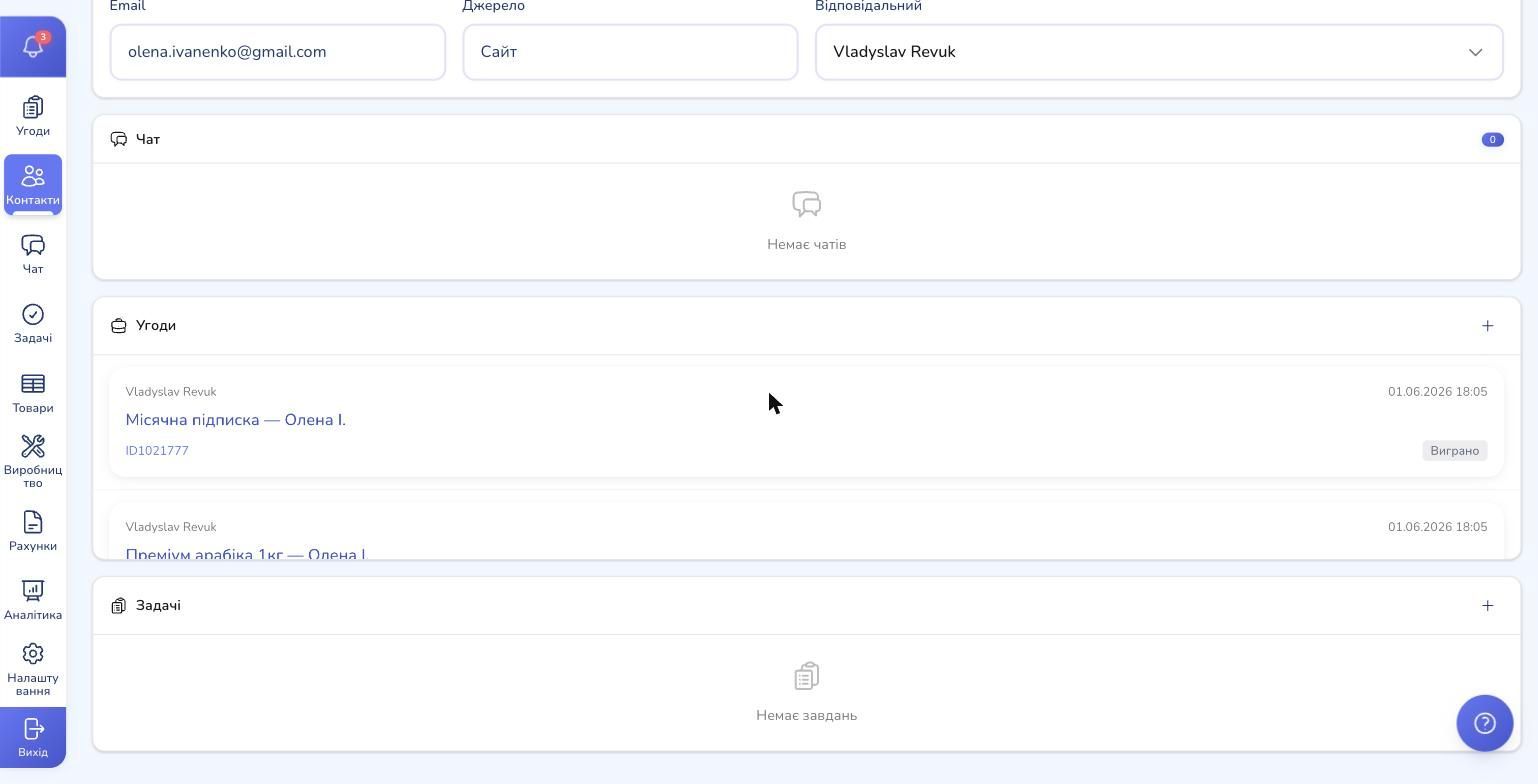
You immediately see:
- Chat — the full conversation history with this customer across every channel (Telegram, Instagram, WhatsApp, Viber). Each chat shows its messenger icon and the timestamp of the last message.
- Deals — open and closed deals for this customer. Olena has already bought the "Monthly subscription" (status Won) and picked up a "Premium Arabica 1kg."
- Tasks — anything that needs doing: call back, send documents, congratulate on a birthday.
That's the 360° customer view in action. Nobody is guessing "what did we talk about last week" — they just open the card.
Adding a new contact
The + Add contact button is in the top right. It opens an empty form — same layout as an existing contact card, just blank.
All you need to enter is the name — the contact gets created in the system instantly (and receives an ID). You can fill in the rest (phone, email, source) gradually, even over weeks. Everything gets attached to the same card.
💡 Why this matters: in real life, the first thing a manager gets from a lead is usually a name and a phone number. While you're dialing, you add the source. While you're asking questions, you capture the email. That's how real sales work, and the CRM doesn't demand everything upfront.
Tags: keep your base organized
Tags are the simplest, most flexible way to segment customers. A single contact can have any number of tags: VIP, Café, Delivery, Loyalty program — all at once.
How to create your own tag:

- On a contact card, click the Tags field
- Start typing the name — for example, B2B
- If the tag doesn't exist yet, an option appears: + Add new tag: B2B
- Click it — and the tag is both created and applied to the contact
Done. From now on this tag is available across all contacts and filters.
How we recommend naming tags
A rule that works: a tag should answer one question. Not "Hot lead from Instagram after May ad campaign," but Instagram + Hot lead as separate tags. That way you can combine them however you want in filters.
Proven patterns:
- Source:
Instagram,Facebook,Website,Referral - Customer type:
VIP,Returning,B2B,Wholesale - Segment:
Café,Restaurant,Delivery - Deal stage:
Hot lead,Cold lead,Paused
Custom fields: shape contacts around your business
Standard fields (name, phone, email) don't fit every industry. A dental clinic needs a Patient card number. A logistics company needs a Tax ID. An English school needs a Proficiency level. RevukCRM lets you add any field of your own directly to the contact card.
How it works: click the gear icon next to the "Main" category and the custom fields manager opens.
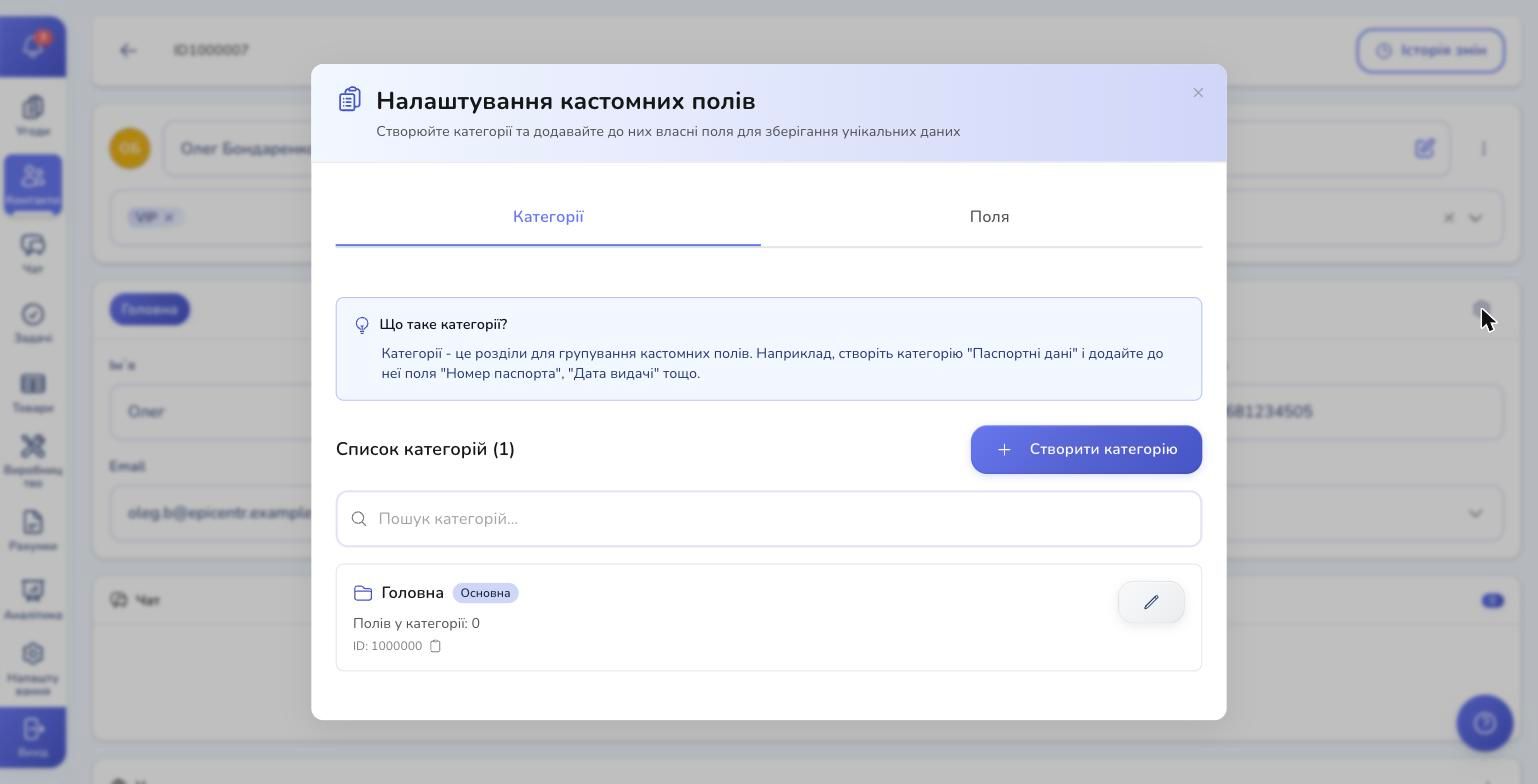
First you create a category (think of it as a tab inside the card) — for example, "Passport details" or "Technical specs." Then you add fields to it.
When creating a field, you pick its type — and there are quite a few:
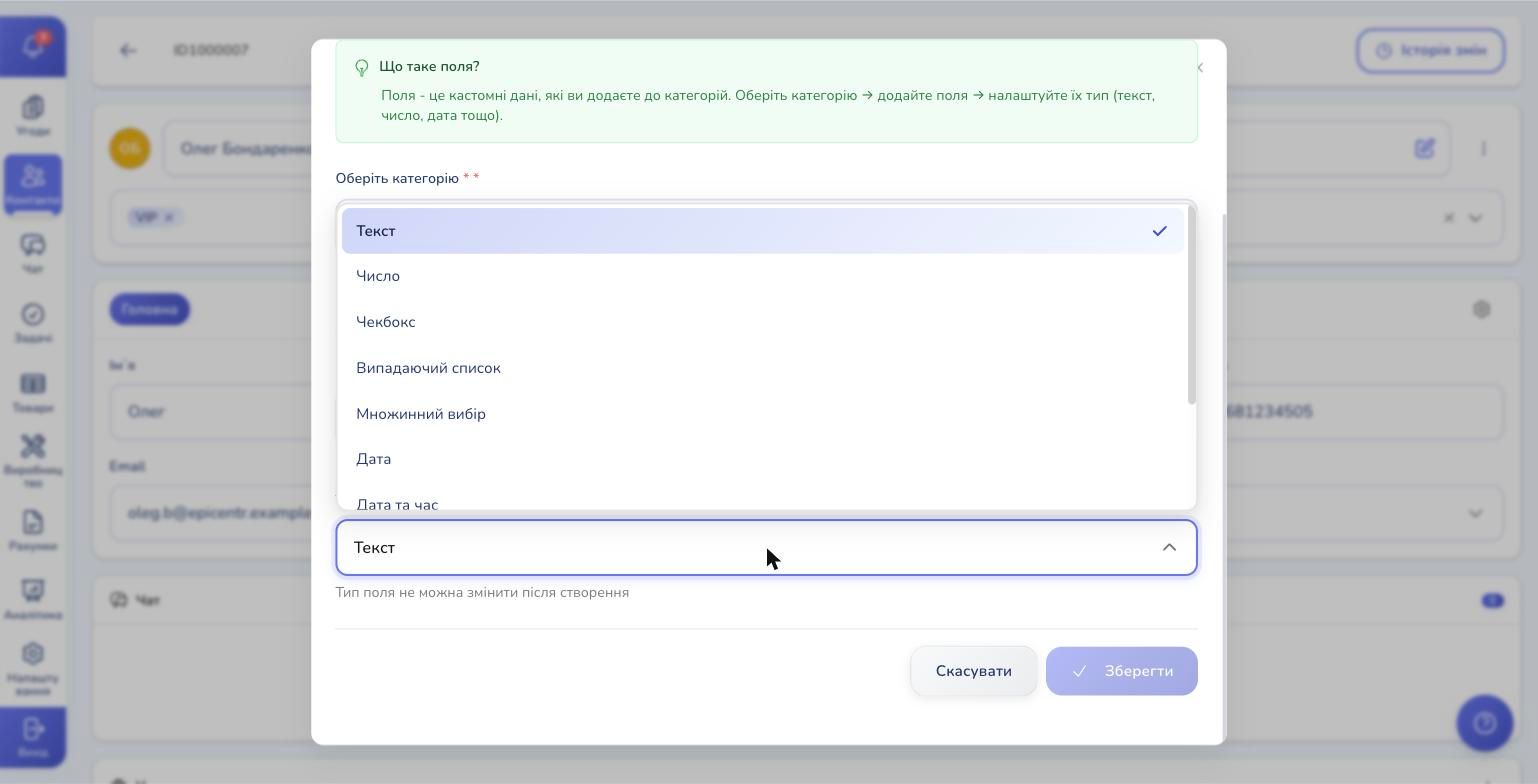
- Text and Textarea — for short and long-form text
- Number — sums, percentages, counts
- Checkbox — yes/no (subscribed to the newsletter?)
- Dropdown and Multiselect — when there's a set of options (industry, business type)
- Date and Datetime — birthdays, next contact date, deadlines
- URL — links to social profiles or the customer's website
Every such field automatically shows up in the contact form, in the change history, and in the filters. Which means you can search for "all customers with a June birthday" or "everyone on the Premium tier" right away.
⚠️ Important: a field's type can't be changed after creation. So think ahead — is it a number or text, one value or several? If you have to switch later, create a new field, migrate the data, then delete the old one.
Bulk actions: change many contacts at once
A new manager Anna just joined, and you want to reassign 15 customers to her. Or after a trade show, you need to tag 30 fresh contacts with "Coffee Expo 2026." Instead of clicking through each one, use bulk actions.
Here's how:
- Tick the boxes on the left next to the contacts you want
- A panel slides in from the bottom: "Selected: N"
- Pick an action:
- Owner — change the responsible manager on all selected contacts
- Tags — replace the tag set in bulk
- Delete — delete with confirmation
The action runs instantly across every selected contact — seconds instead of dozens of clicks.
⚠️ Careful with bulk delete: deleted contacts can't be restored. The CRM will ask once more, but build the habit: filter → review the list → only then click delete.
Real-time for teams: everyone sees changes immediately
If you're working in a team of 3+ managers, this feature is a quiet lifesaver. When someone adds a new contact, changes a phone number, or updates tags — everyone else's list refreshes automatically, no F5 needed.
Same goes for deletion: if a colleague removes a contact, it disappears from your list within a fraction of a second. No stale data, no calls to a customer who already churned.
When something goes wrong — change history
In the top right of every contact card there's a "Change history" button. It's a full log: who edited the name, the tags, the phone number, the responsible manager, and when. Useful when you need to investigate "who removed Olena's phone number" or "when did we add the VIP tag."
Where to start
If you've just begun using RevukCRM, here's a 30-minute minimum plan:
- Create 2–3 tags you actually need (for example,
Hot lead,Returning,VIP) - Add your first 5 contacts — the most important customers who bring in the most revenue
- Tag them — that alone will let you see segments immediately
- Assign owners — every manager should know who they're working with
- Try the search and filters — these are the most-used CRM actions, so build the habit early
Custom fields, bulk actions, messenger integrations — add those gradually, as needs emerge. Don't try to configure everything perfectly on day one. The CRM should grow with your business, not the other way around.
Wrap-up
Contacts in RevukCRM aren't just a list of people. They're the starting point of every interaction: chats, deals, tasks, payments — all gathered on one page automatically. Managers get a 360° card, leadership gets a full segmented picture, marketers get sources and tags.
Start small: add a few customers, set up three tags, try reassigning them in bulk — and you'll feel the CRM start saving your time instead of consuming it.
Ready to bring order to your customer base?
Try RevukCRM for free and organize your customer base in a single evening. No limits on contacts, tags, or custom fields.
Tags