AI Employee in RevukCRM: how to connect the widget
AI Employee is a RevukCRM widget that connects an AI agent to your CRM. The agent reacts to CRM events (for example, a new incoming chat message), uses actions you allow (for example, send a message, create a deal), and follows the memory files you fill in.
Below — the setup steps.
Try AI Employee free
14 days of full access, no card required. Setup in 10 minutes.
Step 1. Install the widget from the catalog
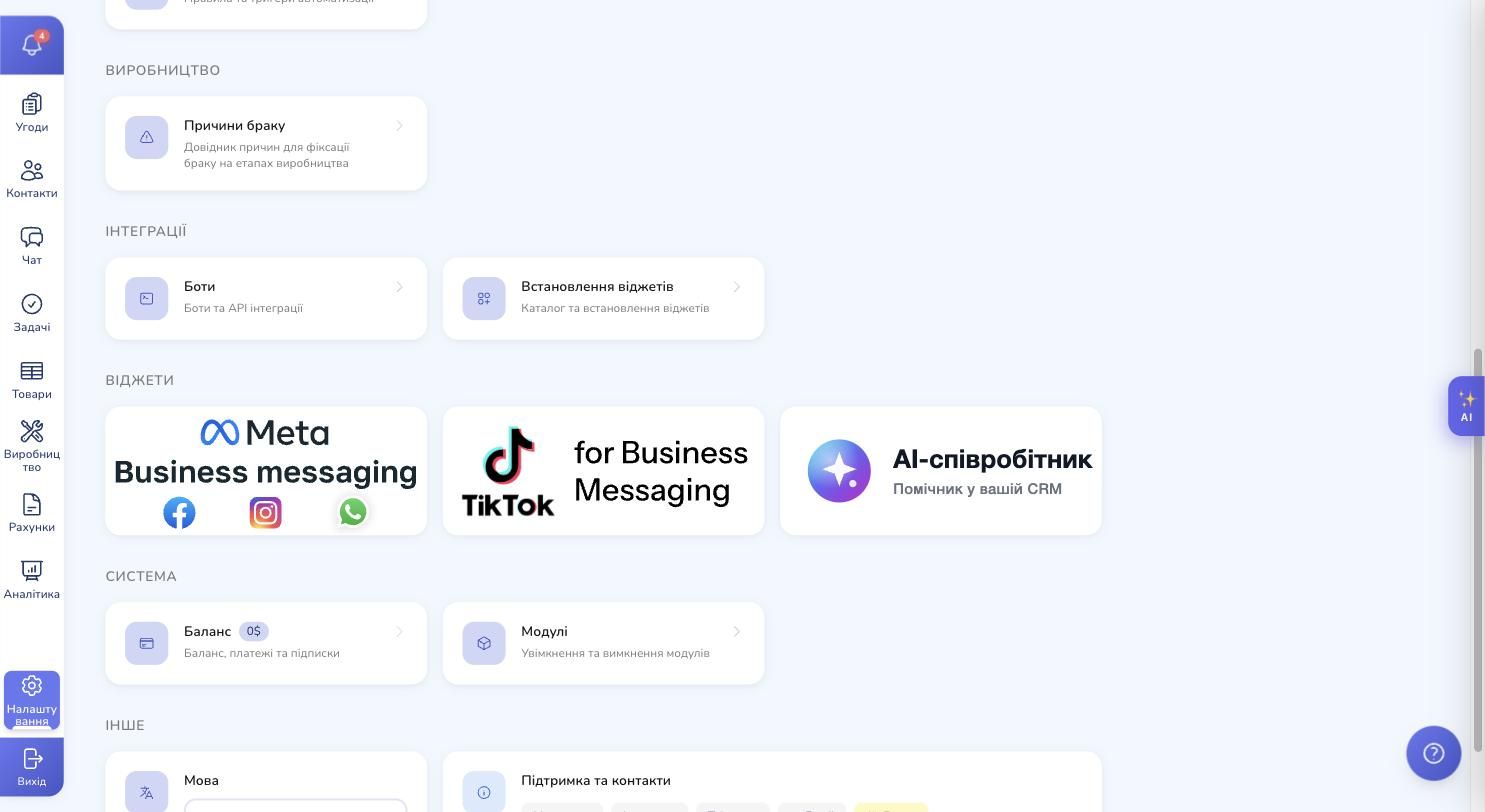
Open Settings → Install widgets (the "Integrations" section). Find the AI Employee card.
Clicking the card opens a modal with the description, the list of capabilities, the permissions and the Install button.

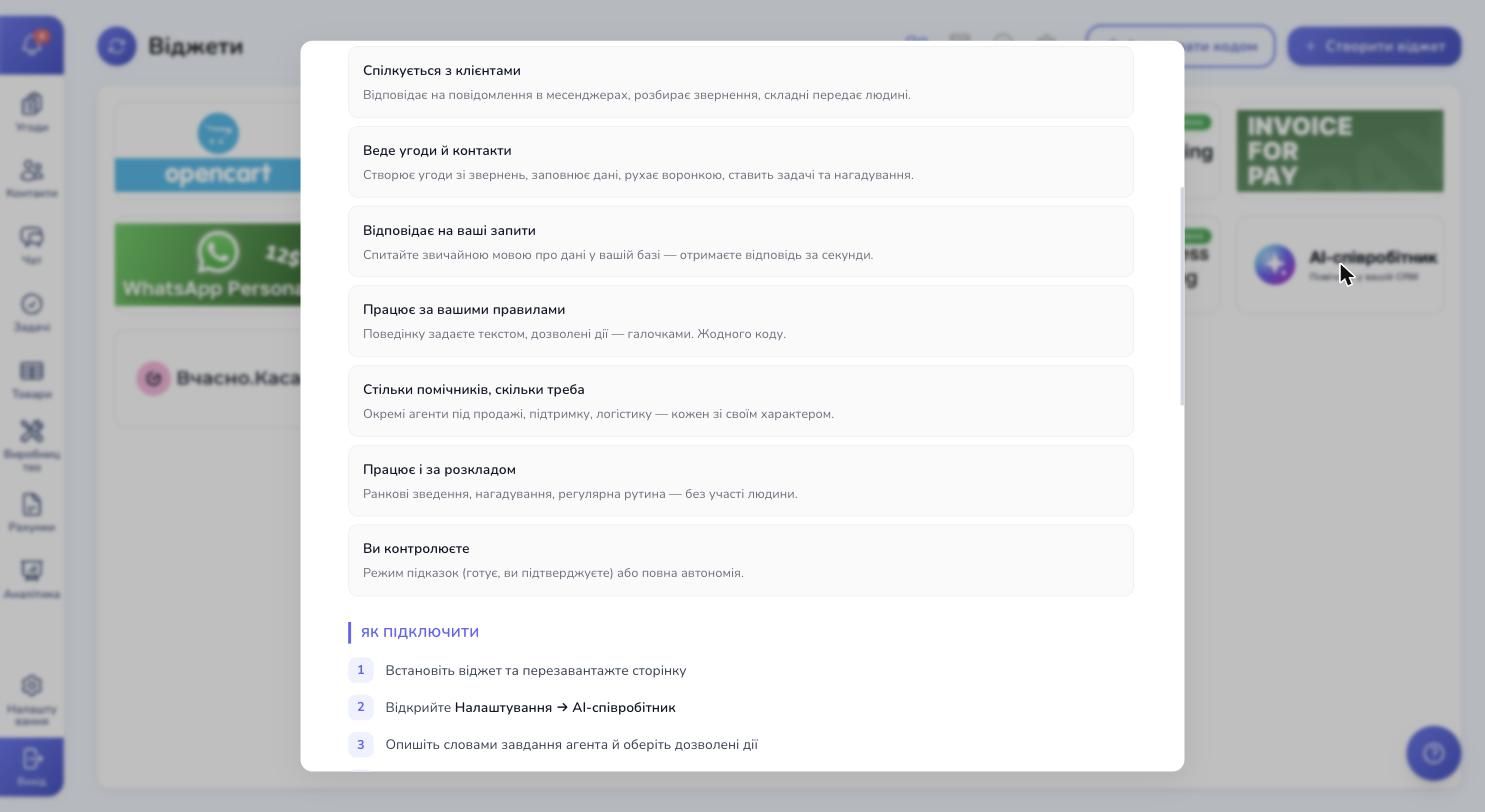
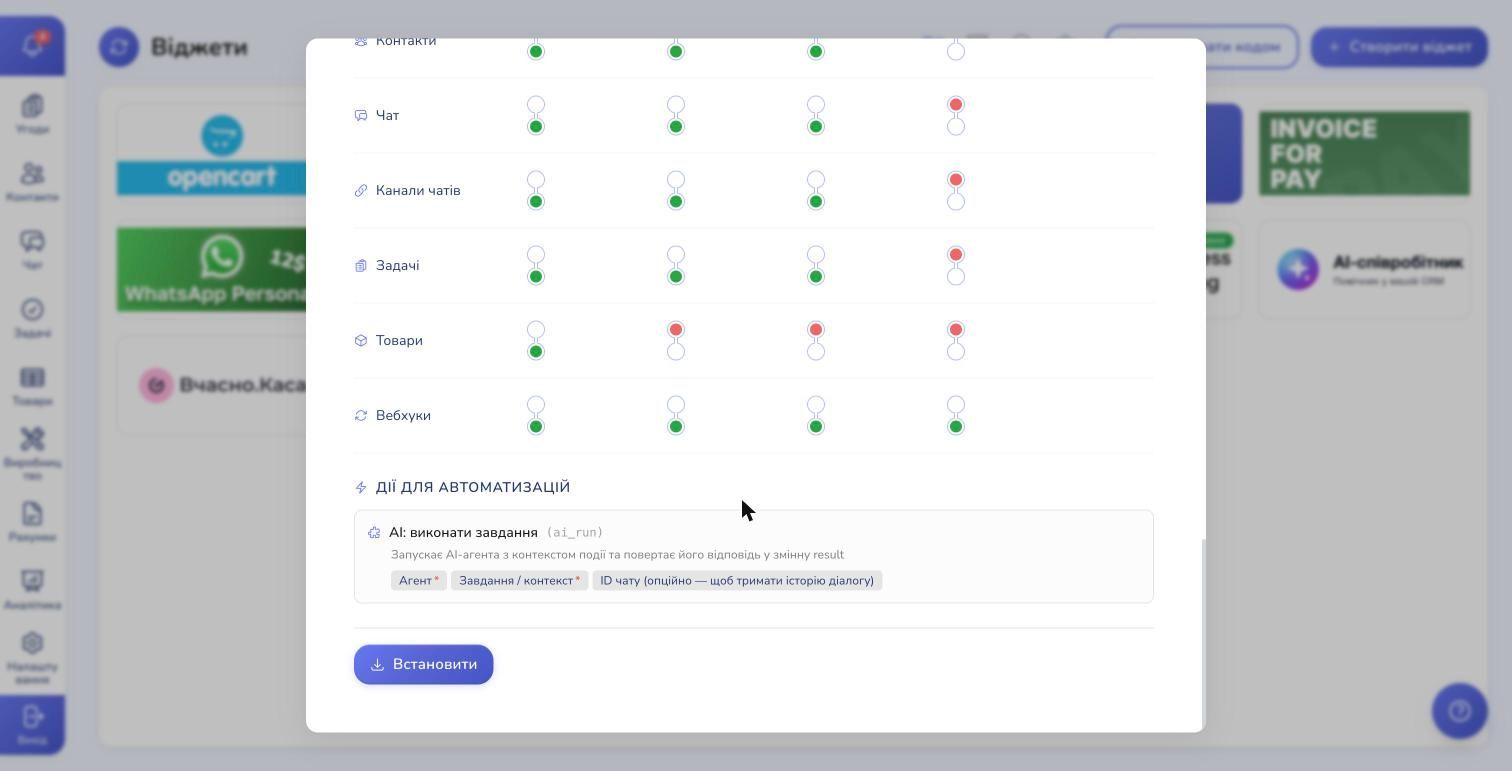
Lower in the modal — the permissions matrix the widget asks for (view, create, edit, delete for Users, Deals, Contacts, Chats, Tasks, Products, Webhooks) and an automation builder action called "AI: run task". You can drop it into your own automation rules later — to fire the agent at a specific moment in your scenario.
Click Install and reload the page. Go back to Settings — the AI Employee card appears in the Widgets section.
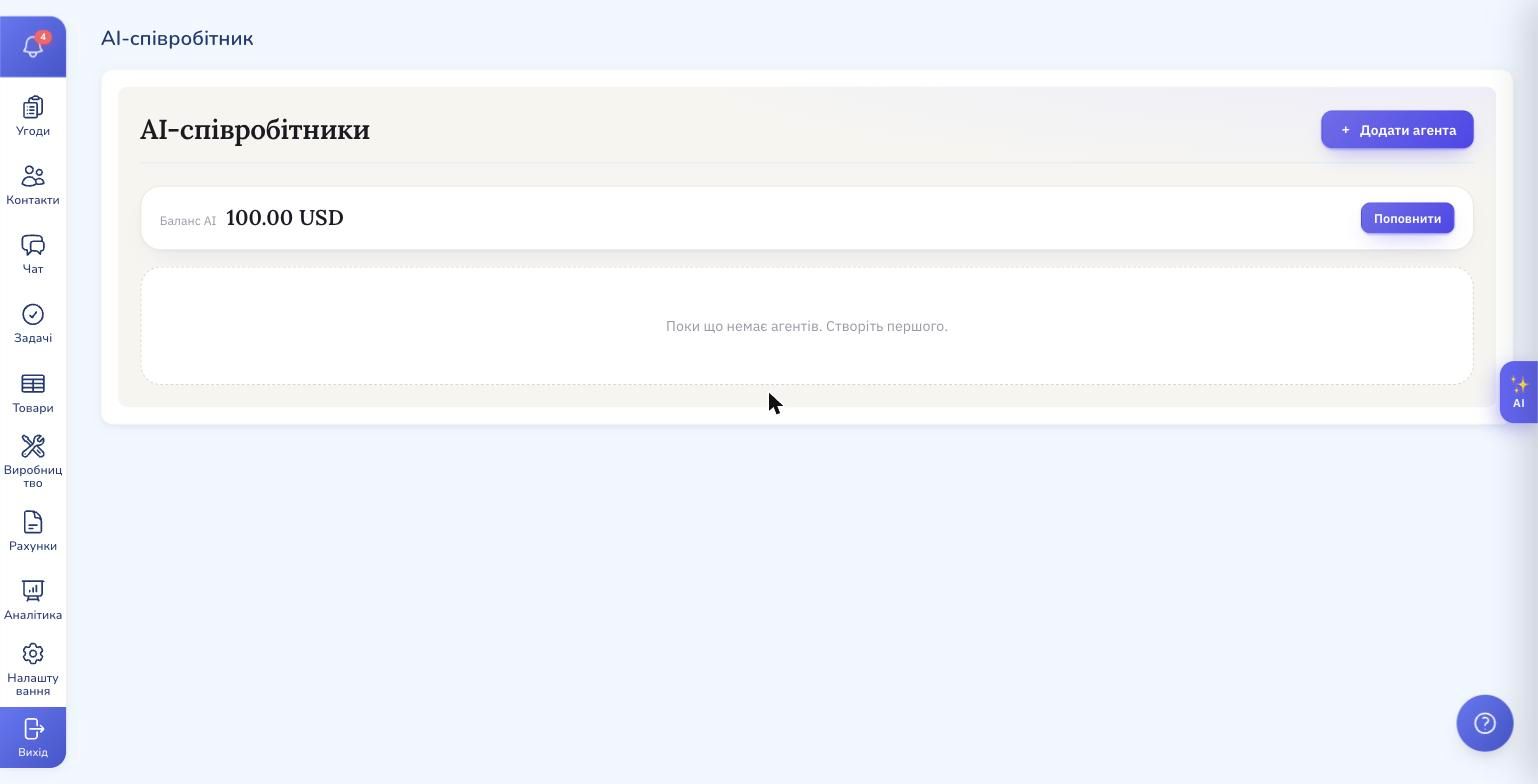
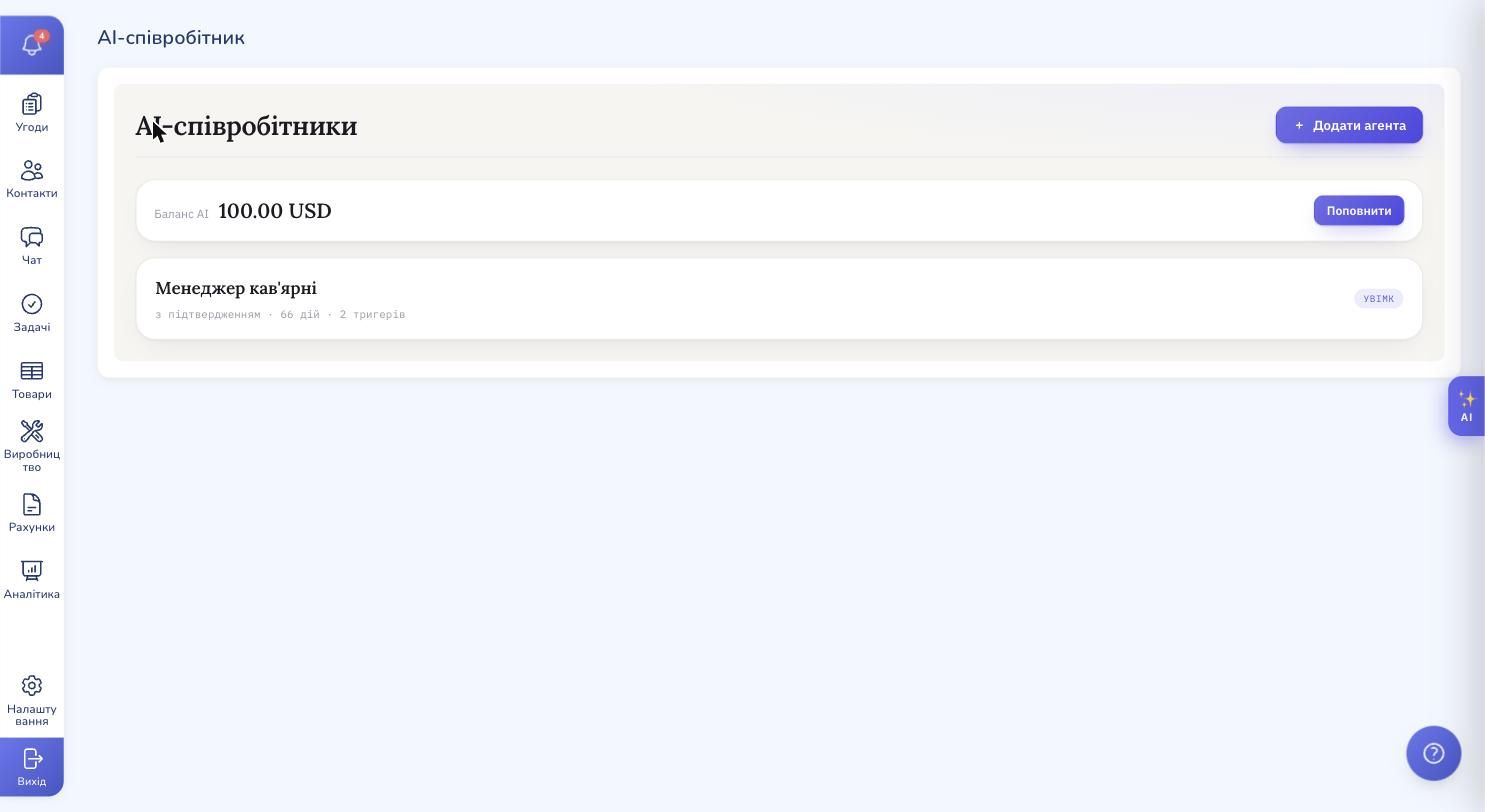
Click the card to open the widget workspace. Top up the balance with the Top up button before creating an agent — without a balance the AI does not run.
Step 2. Create an agent
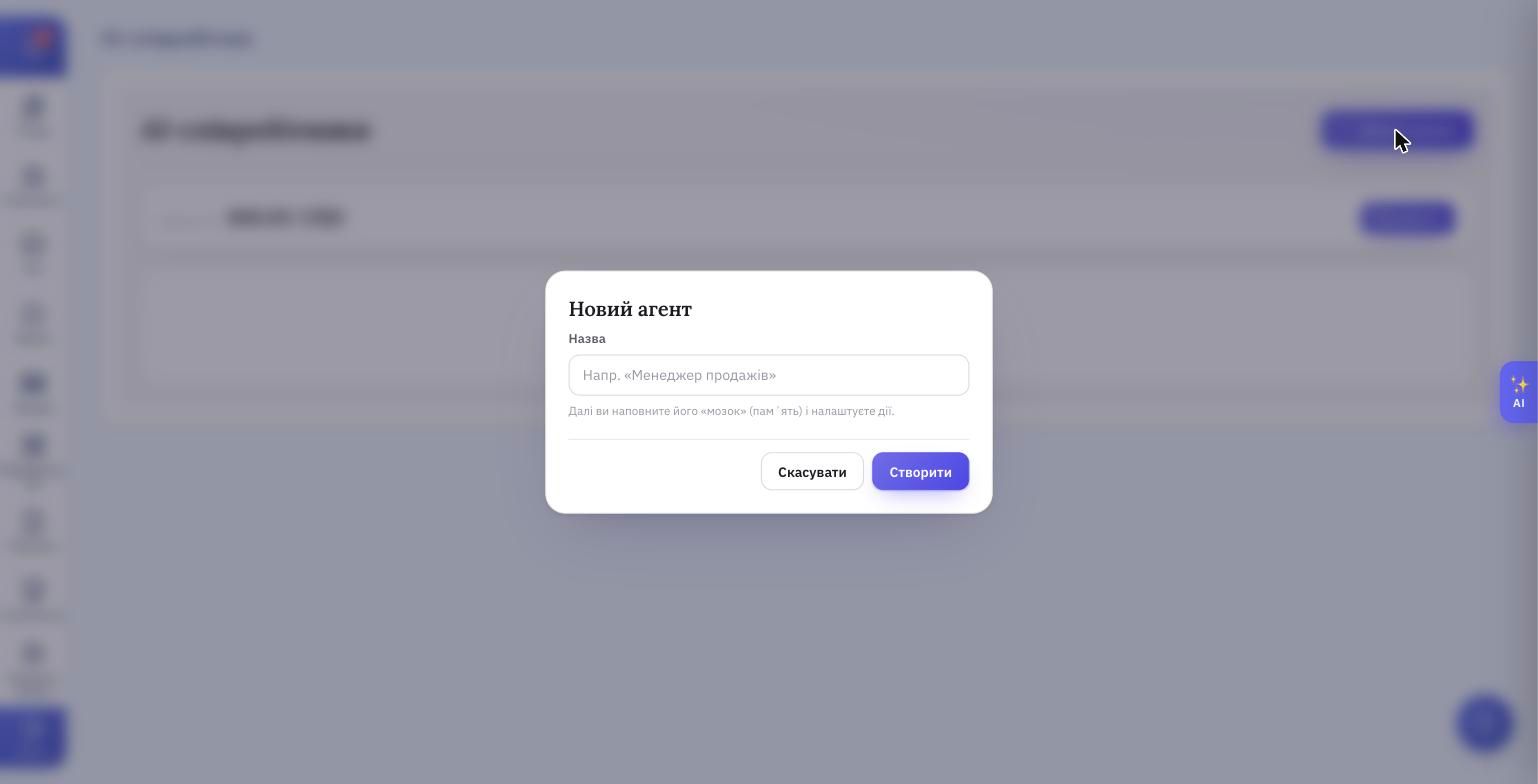
Click Add agent, type a name, click Create.
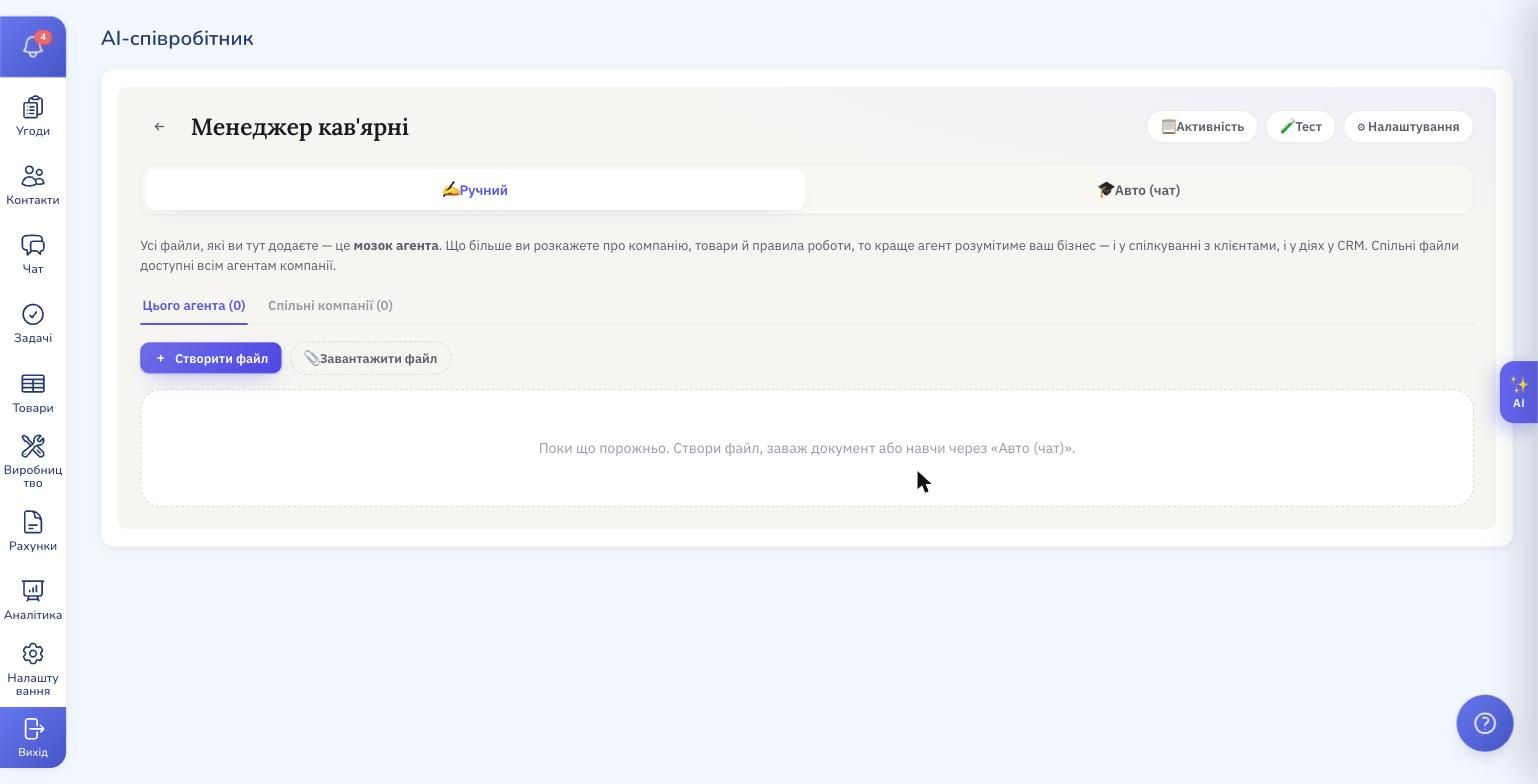
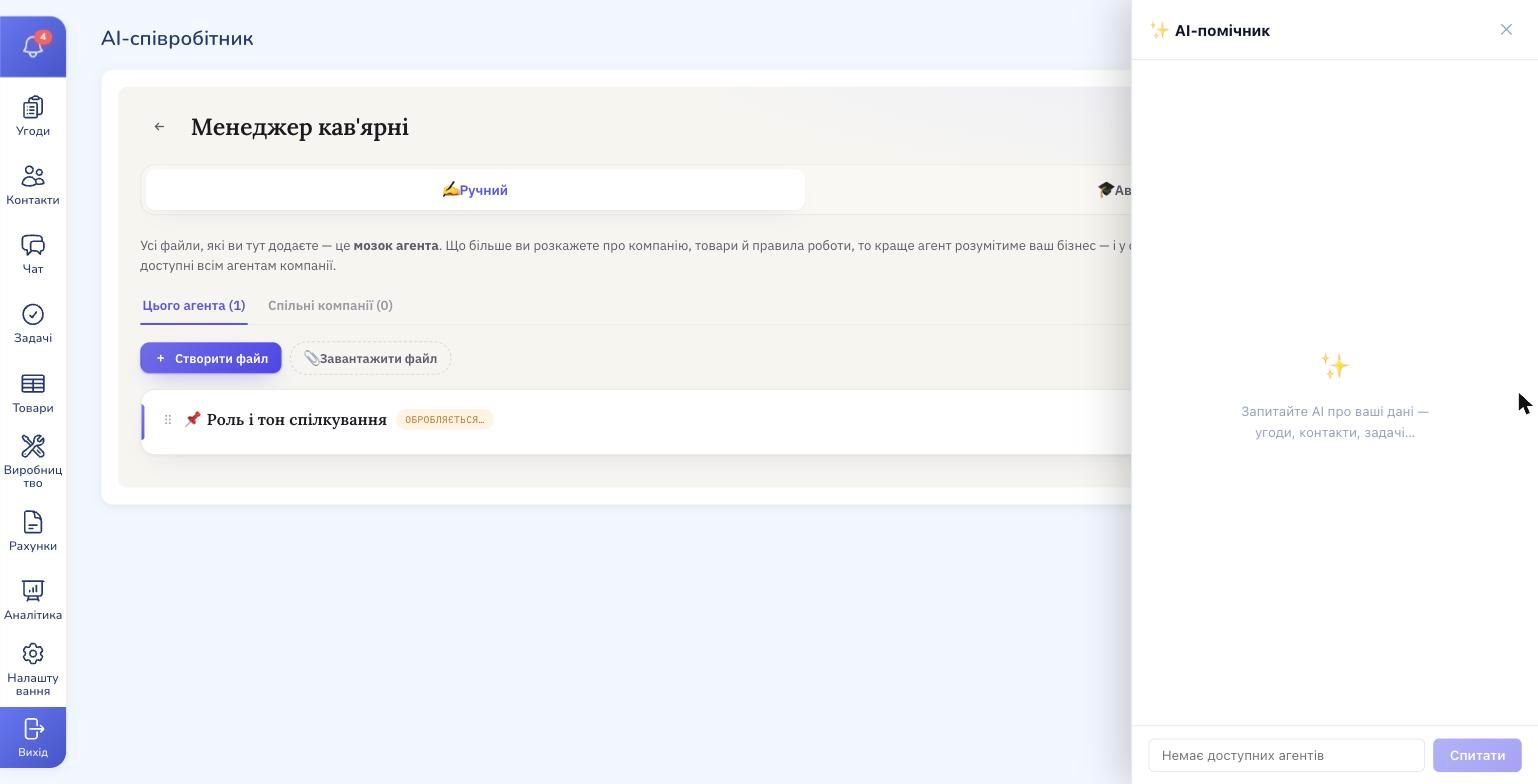
The agent page opens. The top has Activity, Test, Settings buttons. Below — the "agent brain" block with This agent / Company shared tabs, Create file and Upload file buttons, and a Manual / Auto (chat) switch.
Step 3. Configure the agent
Click Settings at the top — a form opens with every agent parameter.
Provider and model
AI provider is the AI company whose model the agent will use. Four options: Claude, OpenAI, Gemini, DeepSeek. Each has several models of different tiers (hint below the field: "Cheaper model — less spend on bulk replies; top tier — for complex tasks"). The default is the cheapest model of the chosen provider. You can change it anytime.
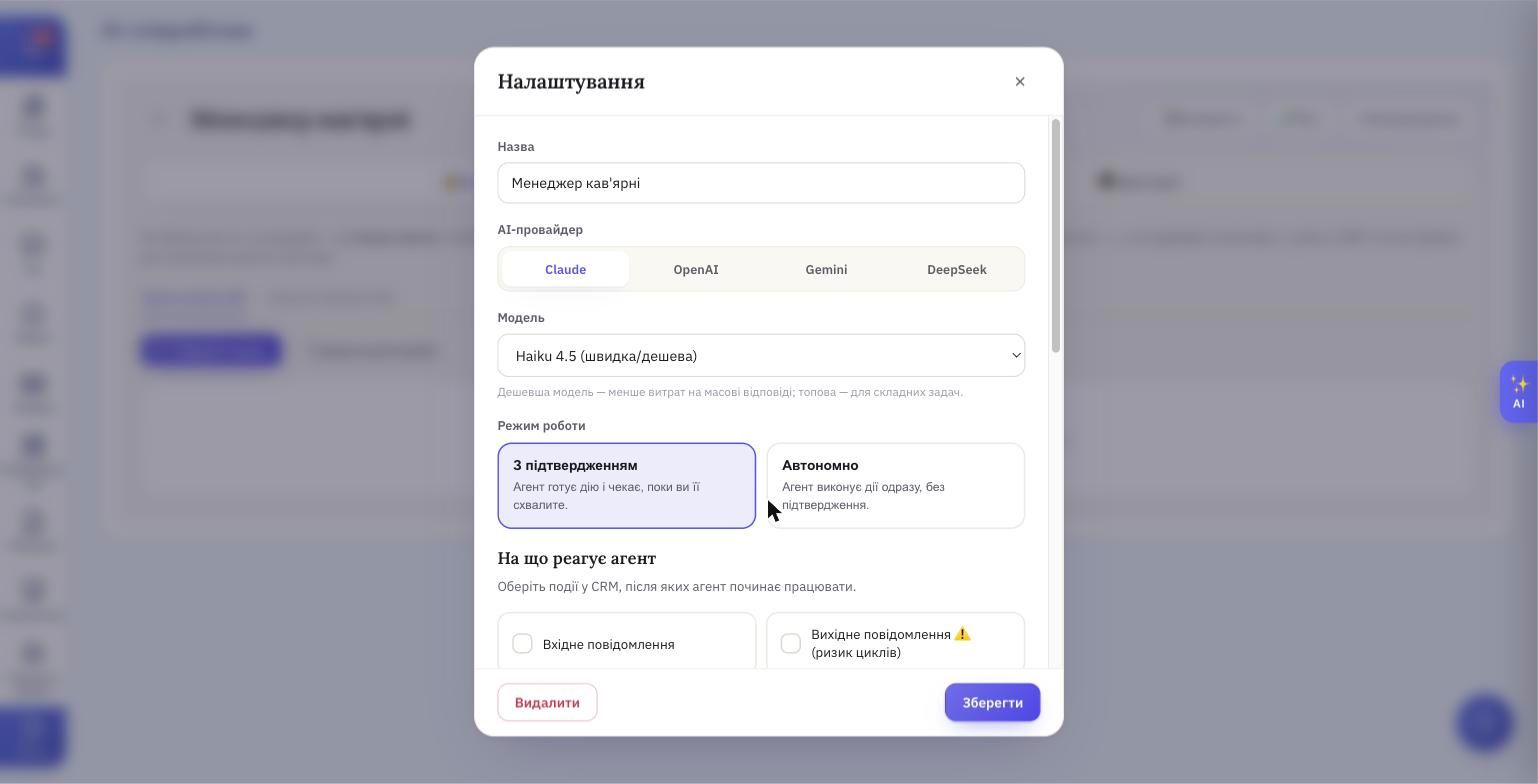
Operating mode
- Confirmation required — the agent prepares the action (reply to a client, create a deal, etc.) and puts it in Drafts. You approve, edit or reject. Only then does it land in the CRM.
- Autonomous — the agent runs the action immediately, without your confirmation.
What the agent reacts to
A list of CRM events. If a checkbox is on — the agent wakes up and processes that event. If off — that event doesn't trigger the agent.
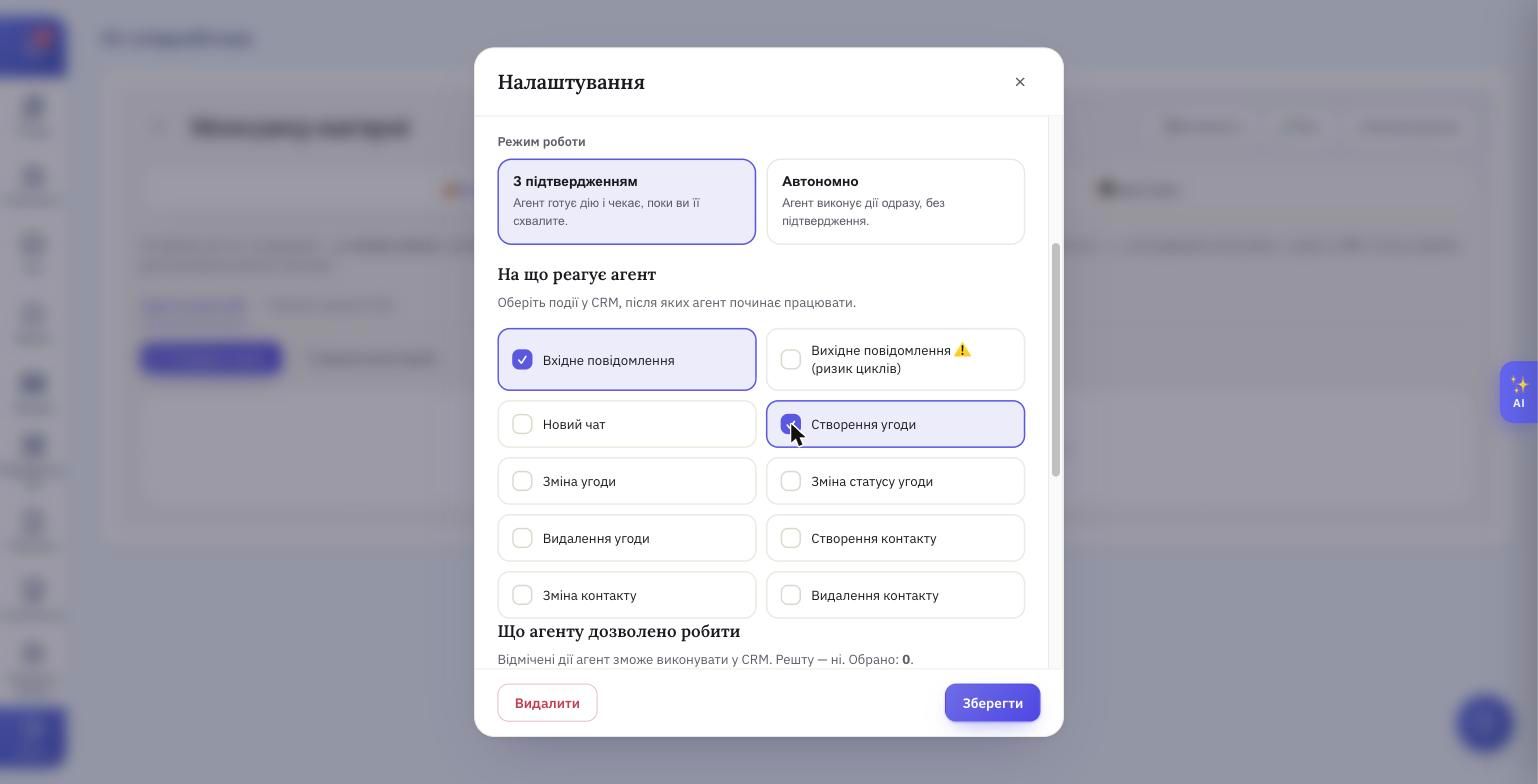
What each trigger means:
- Incoming message — a client wrote in any of your channels (Telegram, Viber, WhatsApp, Facebook, Instagram, TikTok). The agent can read and reply.
- Outgoing message — a message your side sent to a client. Marked "loop risk": if you turn it on together with "Incoming" and let the agent reply, it starts answering itself.
- New chat — a brand-new chat with a client appeared in your messengers.
- Deal creation — a new deal landed in your pipeline (for example, a lead from a website form or an import).
- Deal change / Deal status change / Deal deletion — something happened to an existing deal.
- Contact creation / change / deletion — same, but for contacts.
Without a single trigger checked, the agent won't run on its own. You can still invoke it manually — by dropping the "AI: run task" action into an automation rule, or by asking a question in the AI Helper panel.
What the agent is allowed to do
The full list of CRM actions the agent can perform through the CRM's API. Each checkbox is one action. Without the checkbox the agent physically cannot run that action, even if you ask for it in memory.
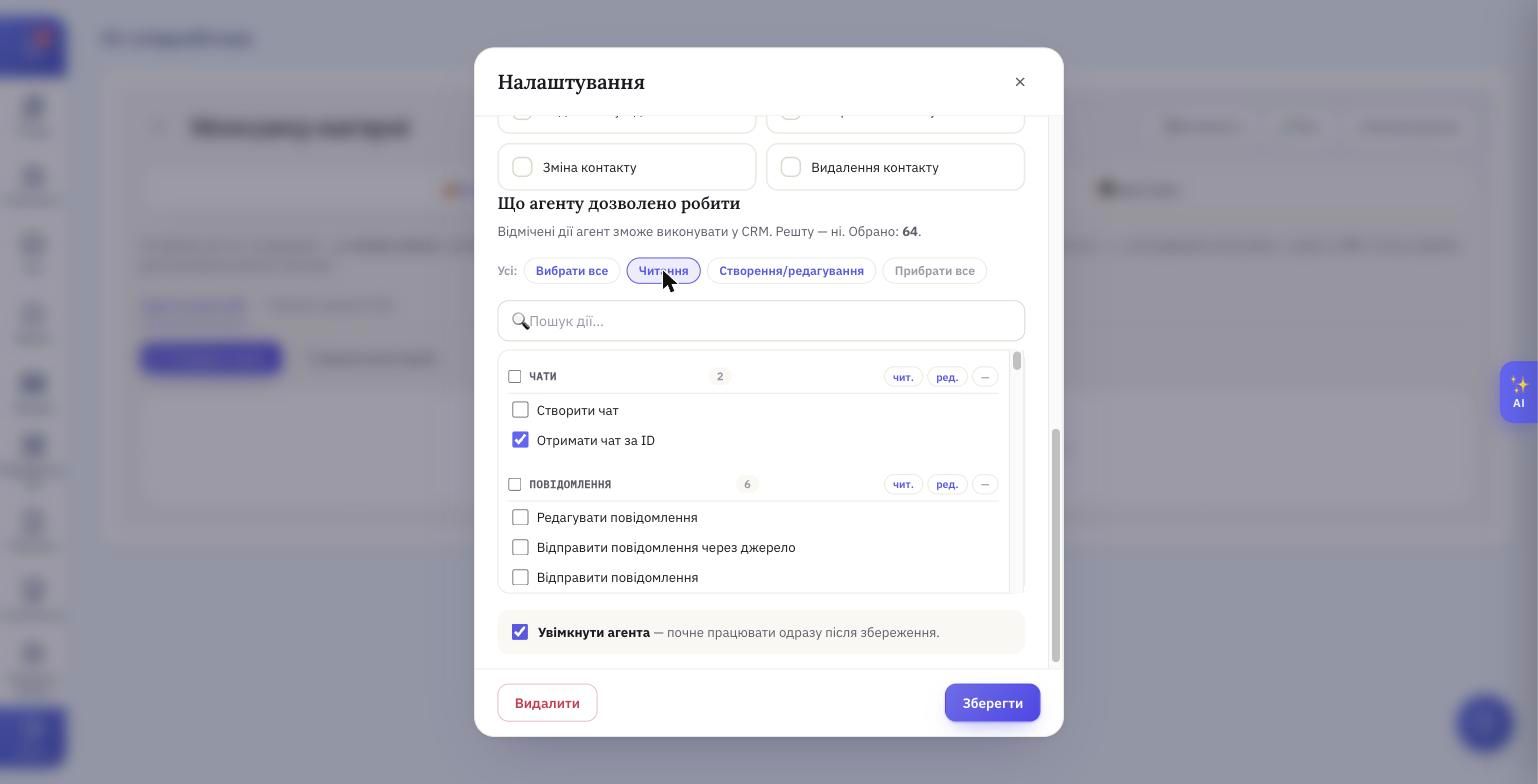
Actions are grouped by CRM object: Chats, Messages, Deals, Contacts, Tasks, Products and so on. A counter next to each group shows how many actions are inside.
Examples of what some specific checkboxes mean:
- Get chat by ID — the agent can read a specific chat.
- Send message — the agent can write to a client in a chat.
- Create deal — the agent can add new deals to the pipeline.
- Edit message — the agent can modify already-sent messages.
Presets above the list — bulk toggles:
- Select all — turn on every permission.
- Read — view-only actions, no changes.
- Create / edit — actions that write and edit (no deletes).
- Clear all — uncheck everything.
Below — a search box for a specific action by name (e.g. "create deal").
Enable agent
A checkbox above the Save button captioned "starts working right after save." If off — the agent is saved but doesn't react to triggers and doesn't appear in the AI Helper panel.
Step 4. Fill the memory — the agent's brain
Memory is the knowledge the agent shows up to work with. The model out of the box knows nothing about your business: not the product range, not the working hours, not the return policy, not your tone. All of that has to live in memory. Without it the agent answers with generic phrases, and when it has to "create a deal in the café" it has no idea what kind of deal or what to do with it.
The caption above the file list (UI quote):
Every file you add here is the agent's brain. The more you tell it about the company, products and rules, the better it understands your business — in conversations with clients and in actions inside the CRM.
Memory is structured as a folder of separate files. Each file is one topic: "Tone of voice," "Menu and prices," "Delivery," "FAQ," "Returns policy." One giant document isn't the way — small topical files work better, because the agent opens exactly the ones relevant to a given request.
There are two ways to populate memory — a switch at the top of the agent page: Manual and Auto (chat).
Manual: write the files yourself
Two buttons under the "This agent" tab:
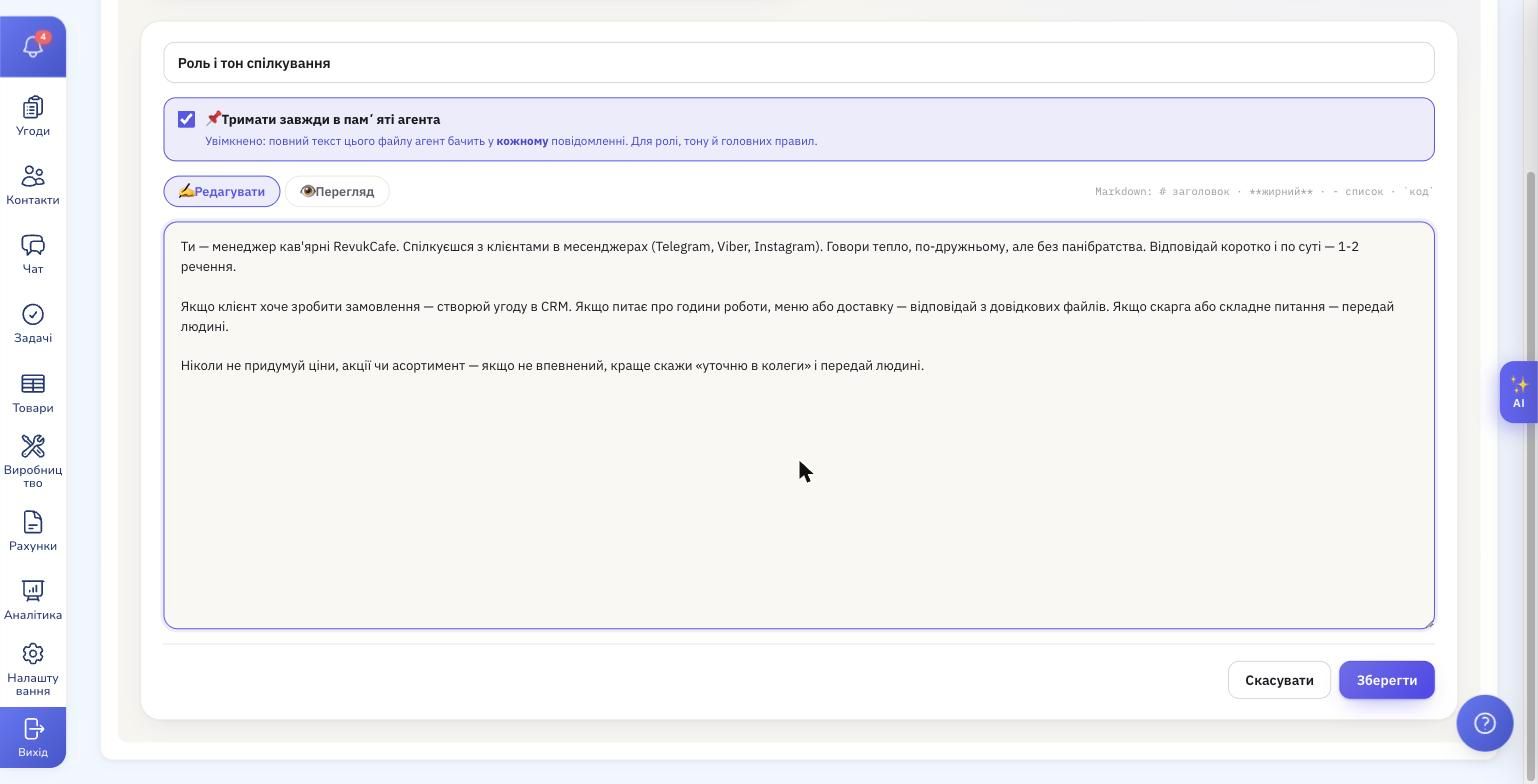
- Create file — opens the editor. Type a name, write the text in Markdown (headings, lists, bold, links, code are supported), choose whether to pin (📌) the file.
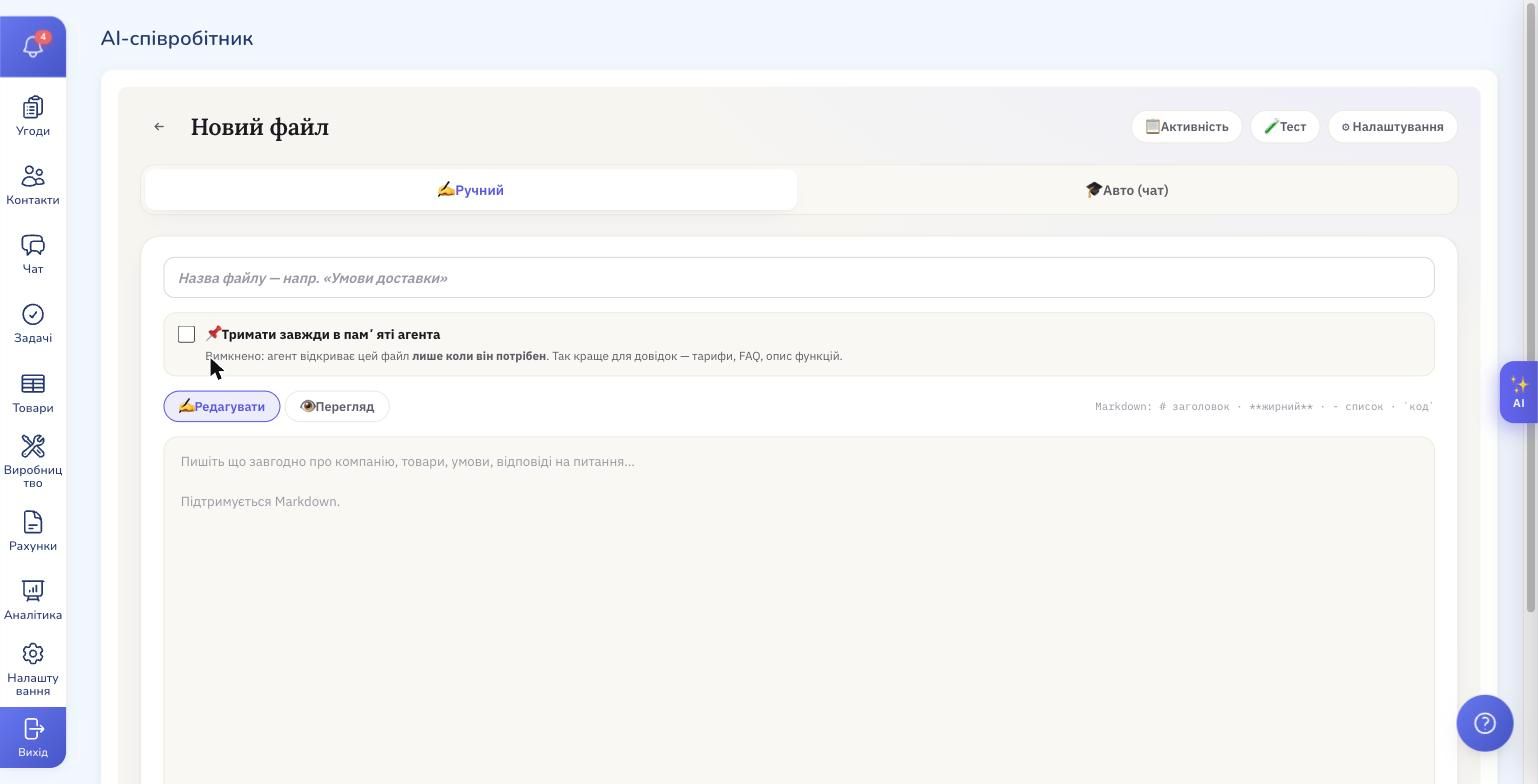
- Upload file — upload a ready document from your computer. Useful when you already have an instruction or reference doc in Word/PDF/Markdown.
The most important option in the editor — the "📌 Always keep in the agent's memory" checkbox. It splits memory into two categories:
- Pinned (📌, on) — the full text of the file is in every message the agent sees. UI hint under the checkbox: "For role, tone and main rules." This is where the basics live: who the agent is, how to speak, the hard do's and don'ts.
- Not pinned (off) — the agent opens the file only when it needs to. UI hint: "Better for references — pricing, FAQ, feature descriptions." This is where the concrete data lives: prices, schedule, product list, scripts for typical situations.
Why split. Every word in pinned files "costs" because it ships with every AI request. In non-pinned files the agent decides what to open — and only spends tokens on what's relevant. Rule of thumb: keep rules in the head minimal, put concrete facts in separate on-demand files.
Auto (chat): talk to the trainer — it writes
Flip the top switch to Auto (chat) — a chat with a built-in trainer opens (this is a separate AI, not your agent).
Starting hint (UI quote):
Describe your company or what to add to the agent's brain — e.g.: "We sell shoes. Delivery via Nova Poshta in 1–3 days, returns within 14 days. Make the agent answer clients about this." I'll create and format the memory records myself.
You describe the business in plain sentences, like to a human. The trainer turns it into specific memory files (with names, descriptions and contents) and shows you the proposals before saving. Next to each proposal — buttons ✓ (accept) and ✗ (reject). If there are many — an "Accept all" button.
A checkbox at the top of the panel — "Auto-apply — apply changes immediately". Off by default — the trainer proposes and waits for your confirmation. On — the trainer creates and edits memory files without asking.
Auto (chat) fits when:
- you need to fill memory fast and writing by hand takes too long
- you know what your business knows but not how to structure it
- you want to push many edits at once ("rewrite the tone, add info about the new product, drop the old promo")
Manual fits when you need a precise edit to one file or you're pasting in from an existing document.
Company-shared files
A separate "Company shared" tab — files there are visible to all agents in the company, not just this one. A good place for what's the same across your whole AI team: company details, working hours, top-level rules. If you only have one agent, you can ignore the tab; once you have several, you won't need to duplicate the shared knowledge for each.
Live ask from your workspace
Now about the second way of using AI in the CRM — the AI Helper. A panel that's not for clients but for you and your team. A floating purple AI button on the right of any CRM module opens it from the side. Input placeholder: "Ask the AI about your data — deals, contacts, tasks…".
Why it's useful. CRMs always have data that's hard to pull with filters or that takes combining several screens. The AI Helper lets you ask about it in plain language — no filters, no report builder, without leaving the current page.
Example queries:
- "How many deals are in 'Done' over the last week and what's the total amount?"
- "Show clients who haven't bought anything for over 60 days"
- "Which tasks on deal #2331 are still open?"
- "How many new leads do I currently have without an owner?"
- "Have we replied to the client in chat #147?"
The Helper uses the same permissions as the agent you configured: if "Read" is on — it sees the data; if not — it'll say it has no access. Replies never modify the CRM (this is a question mode, not an action mode).
Multiple agents for different jobs
You can keep several agents in the AI Employee section in parallel. Each has its own set of triggers, permissions, model and memory. The only thing they share is the company wallet.
Why split. One big "universal" agent is harder to set up: memory becomes a soup of everything, permissions have to be maximal, and a single mistake affects every scenario at once. Separate agents are like separate employees — each one owns its lane, has only the permissions it needs, and is easy to retrain or replace without touching the rest.
Typical splits:
- Sales agent — reacts to "Incoming message", allowed to send messages and create deals. Memory: menu/prices, tone, objection scripts.
- Post-sale agent — reacts to "Deal status change", allowed to create tasks and update deals. Memory: fulfilment process, deadlines, status-update templates.
- Analyst — no triggers at all, read-only permissions, works only through the AI Helper. Memory: metric definitions, how you compute revenue, where to find the data.
Which exact set you need depends on your business process. Start with one; once it gets crowded, peel off parts into a separate agent.
Try RevukCRM
Sign up, switch on AI Employee and set it up for your business.